YOLO model
YOLO (You Only Look Once) model is a machine learning model for real-time object detection. It was introduced in 2015. It's biggest advantage was the speed at the cost of accuracy, but the newest version are more and more accurate.
Using this model you can predict what objects appear in an image and where exactly they appear using bounding boxes (colorful rectangles around the objects). So you can, for example, use this model to detect cars and their positions on a street.
The position detection returns the top left corner of the box and its width and height. The model also returns which object class it detected and the confidence of the detection.
The difference between it and other models at the time, was that it does the detection and classification in one "run". Underneath it uses convolutional neural networks.
Plan
We're going to create a dataset and train a custom YOLO model locally using Python. All the tools will be available for free.
Our model will detect the existence of a "chudjak" meme in a given image. The steps look like this: 1. Get the images for the training from the web 2. Annotate the images 3. Install the YOLO model locally and train it 4. Start predicting and detecting
Let's get started.
Creating the dataset
Downloading the images from the web
Depending on your use case you might download them from different sources.
One of the good sources is the Open Images Dataset from Google. You can even download already annotated images from there.
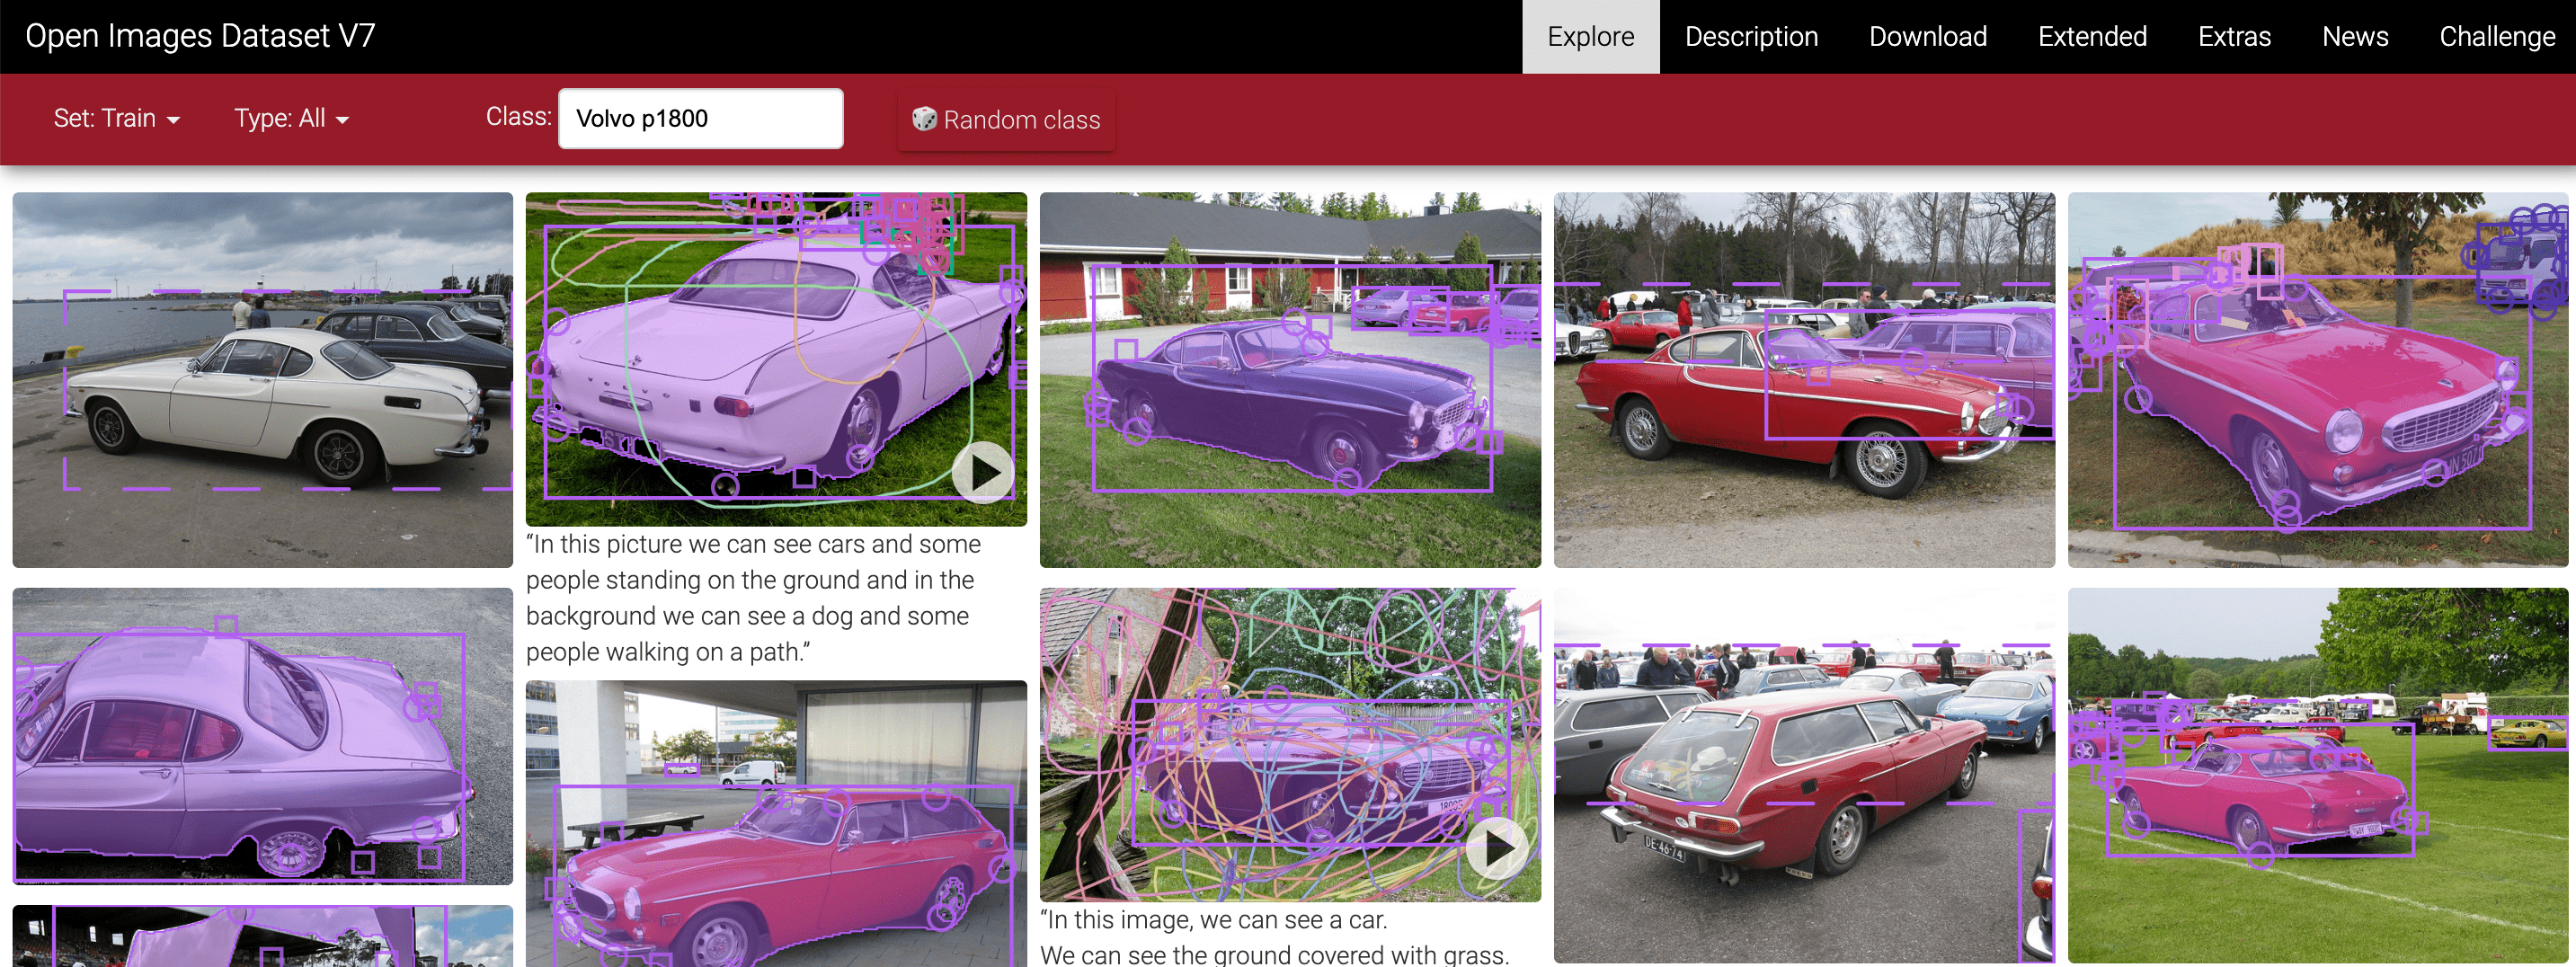
For this simple demonstration I just downloaded images from the google image search. It is not ideal of course, but for our simple use case it is enough.
First, create a new repository/folder.
Then you need to gather the images and put them into a <your repo>/dataset/train/images/ folder.
How many images do you need?
Generally, the more, the better. Serious models should train on at least a few thousand examples.
I gathered only 64 and the model was working well enough after training. The reason for this is that my object is very simple.
Annotating data
We now need to annotate the data, which means to tell the model which "class" exist in an image and where is it. Fortunately we only have one class we want to predict, which makes the whole process a lot easier.
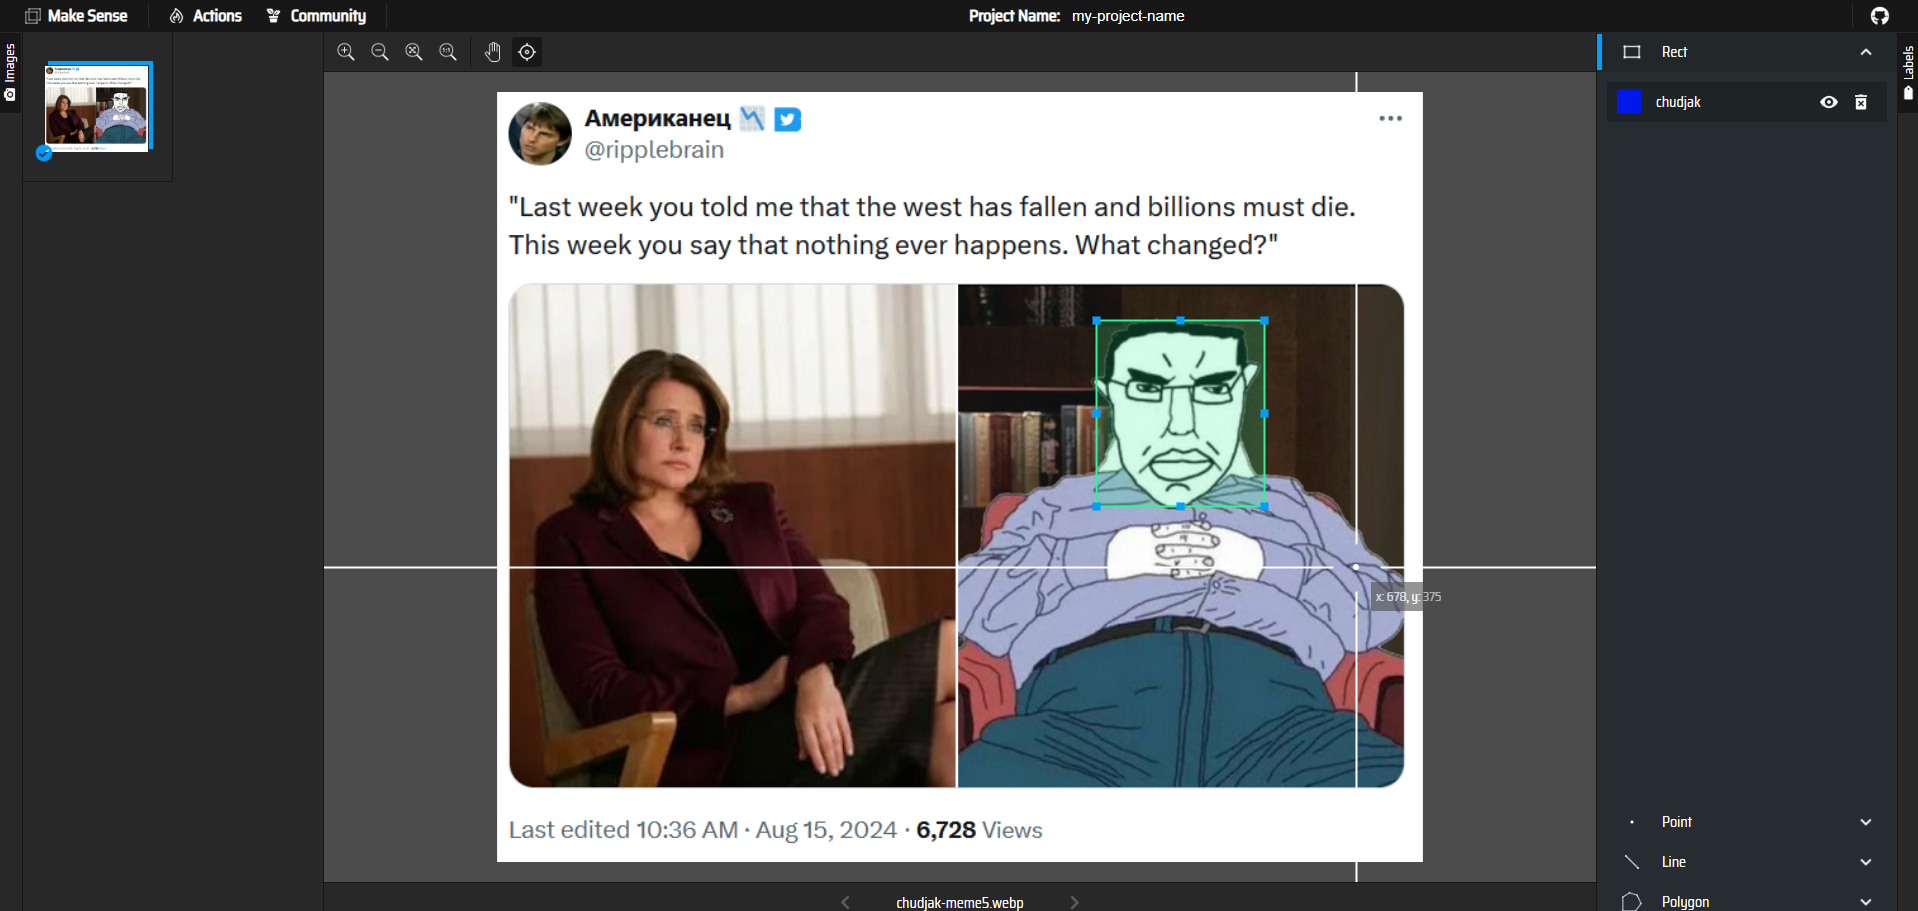
To annotate the data, I used makesense.ai. It is open source, free and super easy to use.
Upload your folder full of images and click "Object Detection" button.
Then create a new label and click "Start Project".
After that, the real work begins. You need to annotate all the images. You need to create the bouding boxes around the objects you want to detect. I think I don't need to describe the process in more detail as the page itself is very intuitive.
Try to annotate the data the best you can, because the quality of it matters a lot.
After you are done, click "Actions" and then "Export Annotations". A ZIP file will be downloaded with the .txt files with annotations like this:
0 0.247801 0.312338 0.208615 0.331169
0 0.143494 0.768831 0.195883 0.314286
The first number represent the class number (in our case just 0) and the rest the x1, y1, width height coordinates of the boxes.
Put the files in <your repo>/dataset/train/labels/
Now we have the dataset ready.
We just need to create the dataset_config.yaml file in <your repo>/dataset/dataset_config.yaml:
# Path to your dataset root folder
path: <full path>\dataset

# Relative paths to images inside the 'path' directory
train: train/images
val: train/images

# Class names (The index must match the number in your .txt files)
names:
  0: chudjak
Please put the full path in the path, because otherwise you might encounter some problems.
Technically, we should also add validation folder to validate the results, but we are going to skip it here.
Training
Installing the packages
We are going to use uv for package management. You can use whatever else tool you want and just translate the command accordingally.
Lets init the project:
uv init
Now let's install the needed packages:
uv add torch torchvision opencv-python ultralytics
The torch packages we just need. OpenCV will come in handy to showcase the image. And ultralytics is the package that will download and train the YOLO models.
We are going to use the yolo11n model. It is the smallest available model but will work well enough.
It is recommended you have a GPU on your computer to make the training quick.
Training
The training is actually super simple. We just need to create a new train.py file like that:
from ultralytics import YOLO


def main():
    model = YOLO("yolo11n.pt")
    model.train(
        data="dataset/dataset_config.yaml",
        epochs=100, # you can make the epochs number smaller, for the results were fine on 100
        imgsz=640,
        device=0, # this will use GPU if possible, if you dont have it, use device="cpu"
    )


if __name__ == "__main__":
    main()
Now, we just need to execute this file and wait for the model to be trained. It will take some time of course.
Testing our model
After the training you will see that the process created a new runs folder. It has some data about the accuracy of the model etc.
But what we are interested in is the runs/detect/train/weights/best.pt. This is "our" model that is trained on the dataset we've just created.
To test it we can do it like this:
import cv2
from ultralytics import YOLO

model = YOLO("runs/detect/train/weights/best.pt")
results = model.predict(source="path/to/your/image.jpg", conf=0.5, save=True)

annotated_frame = results[0].plot()
cv2.imshow("Chudjak", annotated_frame) # this will show an image with the detections
I also created a small repository with the already trained model and a GUI app that allows us to see the predictions of the model in real time here.

As you can see it correctly predicted the uploaded image.
Thanks for reading, I hope I explained well how to create a dataset and train a YOLO model on it.